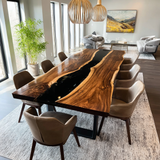
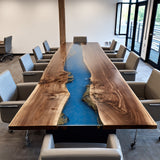
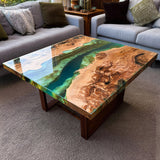
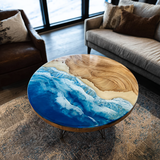



Custom epoxy tables fail due to prep, not skill. Overlook wood, resin, layout, edge, finish, size, or base—and expectations clash. This guide covers it all.
1. Wood Species: The Foundation of Your Table
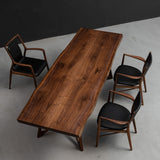
Wood choice affects more than color—it impacts stability, durability, and aging. Hardwoods like black walnut, walnut, ash, and poplar are preferred for epoxy tables due to their strength, minimal warping, and bold grain that shows through resin.
Black Walnut
Known for its rich, dark brown color and striking grain, it offers exceptional durability and stability. It's a premium choice for statement pieces where depth and contrast are desired.

Walnut
Slightly lighter than black walnut, this wood features warm, chocolate tones with a more subtle, straight grain. It provides excellent workability and a classic, timeless appeal.

Ash
Pale in color with bold, open grain, ash is prized for its strength, flexibility, and impact resistance. It's a versatile hardwood that takes stains well and brightens contemporary resin designs.

Poplar
Lightweight and uniform in texture, poplar has a softer, pale cream to greenish hue and is easy to work with. While less durable than others, it's an affordable option for painted or concealed applications.

Here's the non-negotiable rule: kiln‑dried wood only. Wood with excess moisture will shrink, twist, and pull away from resin, causing cracks and failure. Avoid air‑dried or green wood. Confirm kiln‑drying to below 10% moisture content.
2. Resin Style: More Than Just Color
Choose deep-pour resin with UV stabilizers. Tabletop epoxy is only for thin pours (under 1/8″); thicker pours need furniture-grade deep-pour resin to avoid cracking.
Always see pigment in your actual lighting before choosing. Photos or showroom light can misrepresent the color. Request a sample pour or test swatch first.
3. Layout: Where the Resin Flows
The placement of your resin river or design element determines the visual flow of the table.
Common layouts include:
- Center river — resin flows between two live-edge slabs

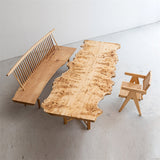
- Single slab resin — resin fills natural voids, cracks, or outer edges of one slab

- Geode or irregular — resin follows organic, unpredictable shapes

- Edge accent — resin runs along the perimeter rather than through the center

4. Edge Style: Defining the Table's Personality
The edge profile dramatically impacts the table's overall appearance and feel. Here are the main options:
Live Edge (Curved or Straight)
 Straight Cut Edge
 Bevel Trimming

5. Finish: The Final Touch
The finish controls the vibe, the durability, and how much maintenance you'll deal with later.
- High Gloss — like a glass-top shine.

- Matte — mutes the shine and gives a soft, almost velvet texture.

- Split Finish-Matt Wood+Gloss Resin

High-gloss finishes offer strong color contrast and clear reflections, while matte and satin options provide better scratch concealment, less glare, and simpler daily care.
6. Dimensions: Size Matter
Getting the dimensions right is critical. Too big, and the table overwhelms the room. Too small, and it feels lost.
Dining tables: 72–96" long (seats 6–8), ~24" per person. Coffee tables: 18–19" high. Desks: 29–30" high with ~25.5" knee clearance.
Always measure your space — and then measure it again. Consider doorways, staircases, and how the table will actually be used.
7. Base: The Foundation of Stability-What to look for:
- Architectural-grade metal bases engineered to support the weight
- Anti-wobble engineering — pedestal footprint and steel weight must match top size
- Powder-coated steel offers high load capacity and rust resistance
- Consider height, width, and mounting compatibility with your top material
Don't leave anything to chance. Prepare thoroughly, communicate clearly with your maker, and your custom epoxy table will be everything you dreamed it would be — and more.
Ready to start your epoxy table the right way? Get your prep work right, and the rest will follow.